Template Editor
When using the GrapesJS Visual Editor for template creation, you'll enjoy a user-friendly interface that simplifies the design process. Here's an overview of the editor's view and available options:

Designing with ease
The GrapesJS Visual Editor empowers you to effortlessly create templates with the following features:
- Drag-and-Drop Elements: Easily add text, images, headings, and more to your template by dragging and dropping elements onto the canvas.
- Text Editing: Double-click on text elements to make direct content edits, allowing for customization as needed.
- Formatting Tools: Access built-in formatting tools to style content, change text colors, and apply various formatting options.
- [[Shortcodes]]: Incorporate dynamic content into your template using shortcodes with the syntax
[[fieldname]]or by selecting one of the field blocks integrated into the editor, which will be replaced with actual content when generating the PDF.
Exploring the GrapesJS Visual Editor
The GrapesJS Visual Editor offers a powerful and intuitive design environment. Here's an overview of the editor's layout and key functionality:
Template Settings (Top Right)
In the top right corner of the editor, you will find a button that opens the Template Settings modal. This modal allows you to customize various PDF settings to match your specific needs.
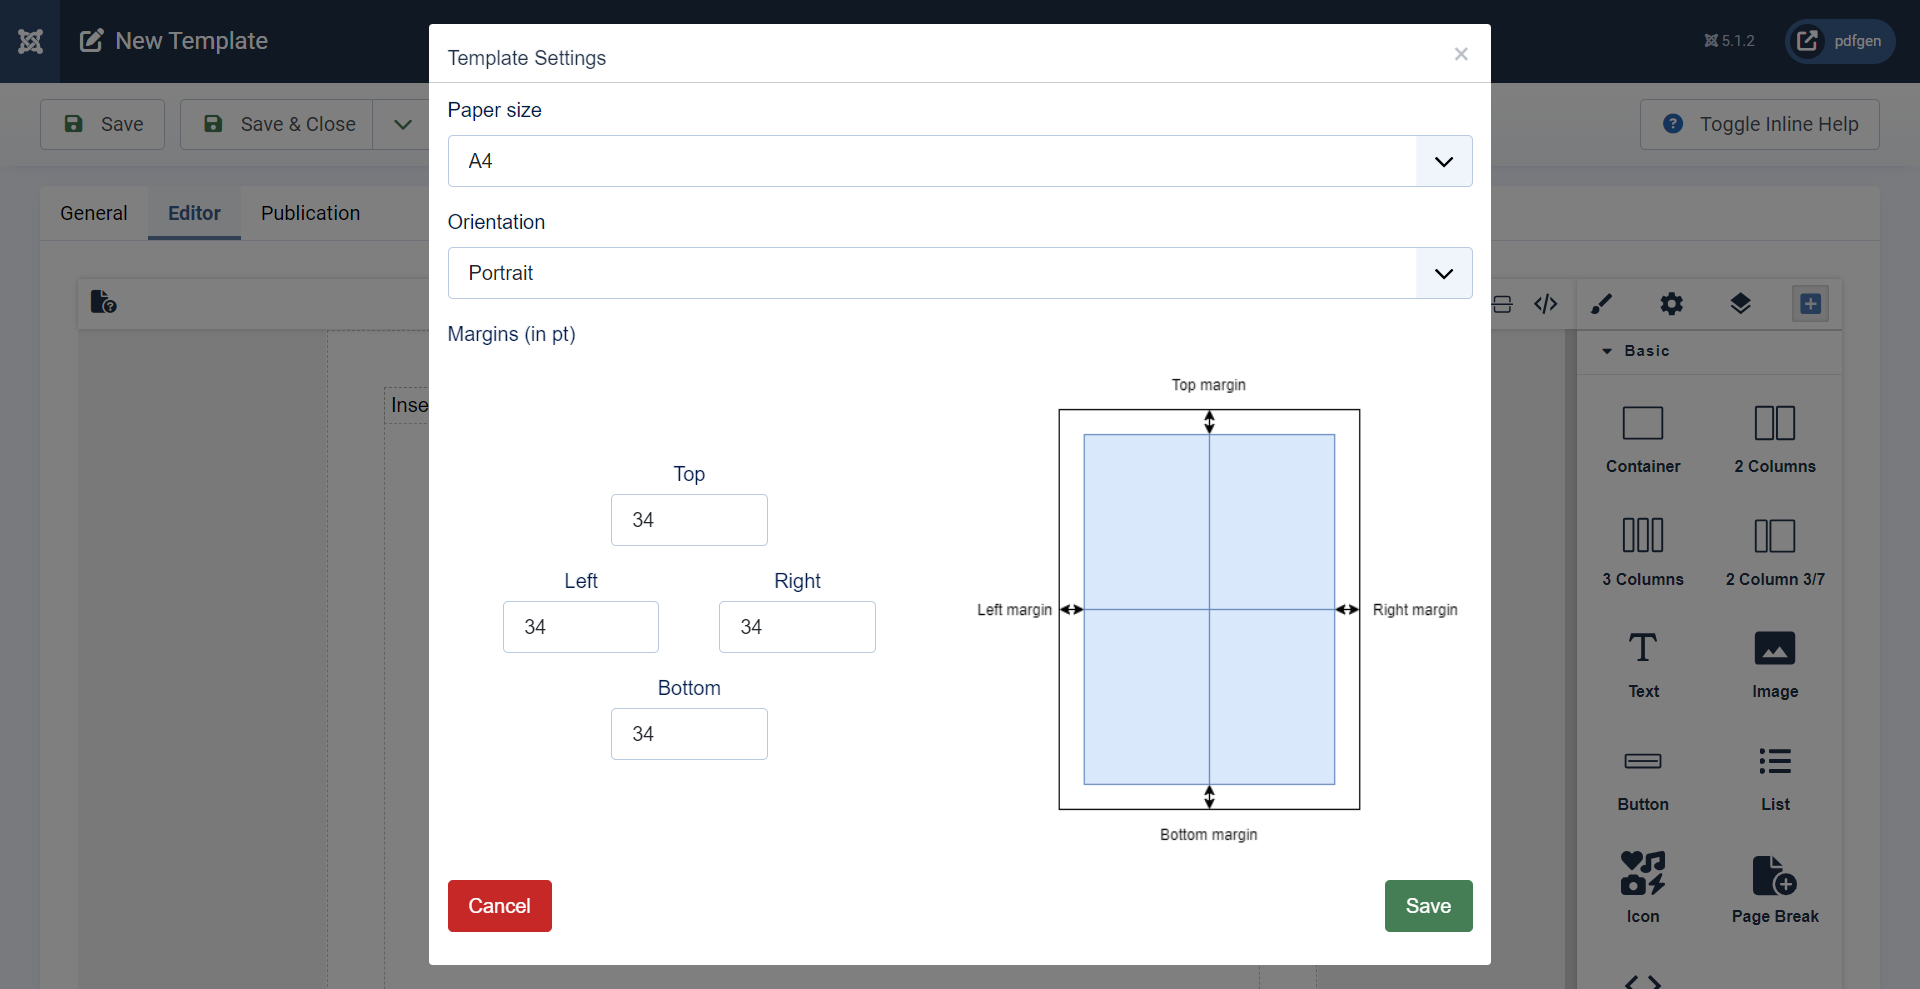
Configurable Settings
In the Settings modal, you can define the following:
- Paper Size: Choose from a wide range of paper sizes, including but not limited to A3 to A6, B3 to B6, C3 to C6, Letter, Half-Letter, Tabloid, and more.
- Page Orientation: Select between Portrait or Landscape orientation, depending on your document's layout requirements.
- Custom Margins: Set custom margins (in points) for the top, left, right, and bottom of the page, giving you full control over the spacing around your content.
Applying and Saving Settings
After configuring your desired settings:
- Click on Save to confirm your selections. The editor will dynamically adjust the canvas size, orientation, and margins to reflect the changes.
- Remember to save your template to ensure all changes are retained.
- (Re)generate your PDF file to apply the new settings to the final document.
These settings help you ensure that your PDF output aligns perfectly with your specifications, enhancing both the presentation and professionalism of your documents.
Actions Panel (Top Left)
Positioned above the canvas, the Actions Panel provides quick access to essential functions:

- Outline: Toggle outlines around components for enhanced visibility (enabled by default).
- Fullscreen: Expand the editor to fullscreen mode for immersive design.
- Undo and Redo: Efficiently reverse or redo recent actions for precise template design.
- Rulers: The 'Rulers' action button, when clicked, adds horizontal and vertical rulers to the canvas, enabling an absolute positioning mode. In this mode, rulers provide precise measurements for element placement, allowing for meticulous design adjustments. The absolute positioning mode enhances your control over element placement, ensuring precise alignment.
- Code Editor: Access HTML and CSS editing screens in a modal for advanced modifications.
Side Panel (Adjacent to Canvas)
Within the Side Panel, you'll discover a range of advanced creative tools. These tools vary depending on the option selected in the Options Panel. These options will allow you to:

- Styles: Customize the appearance of the selected element.
- Options: Define class names or traits for the selected element.
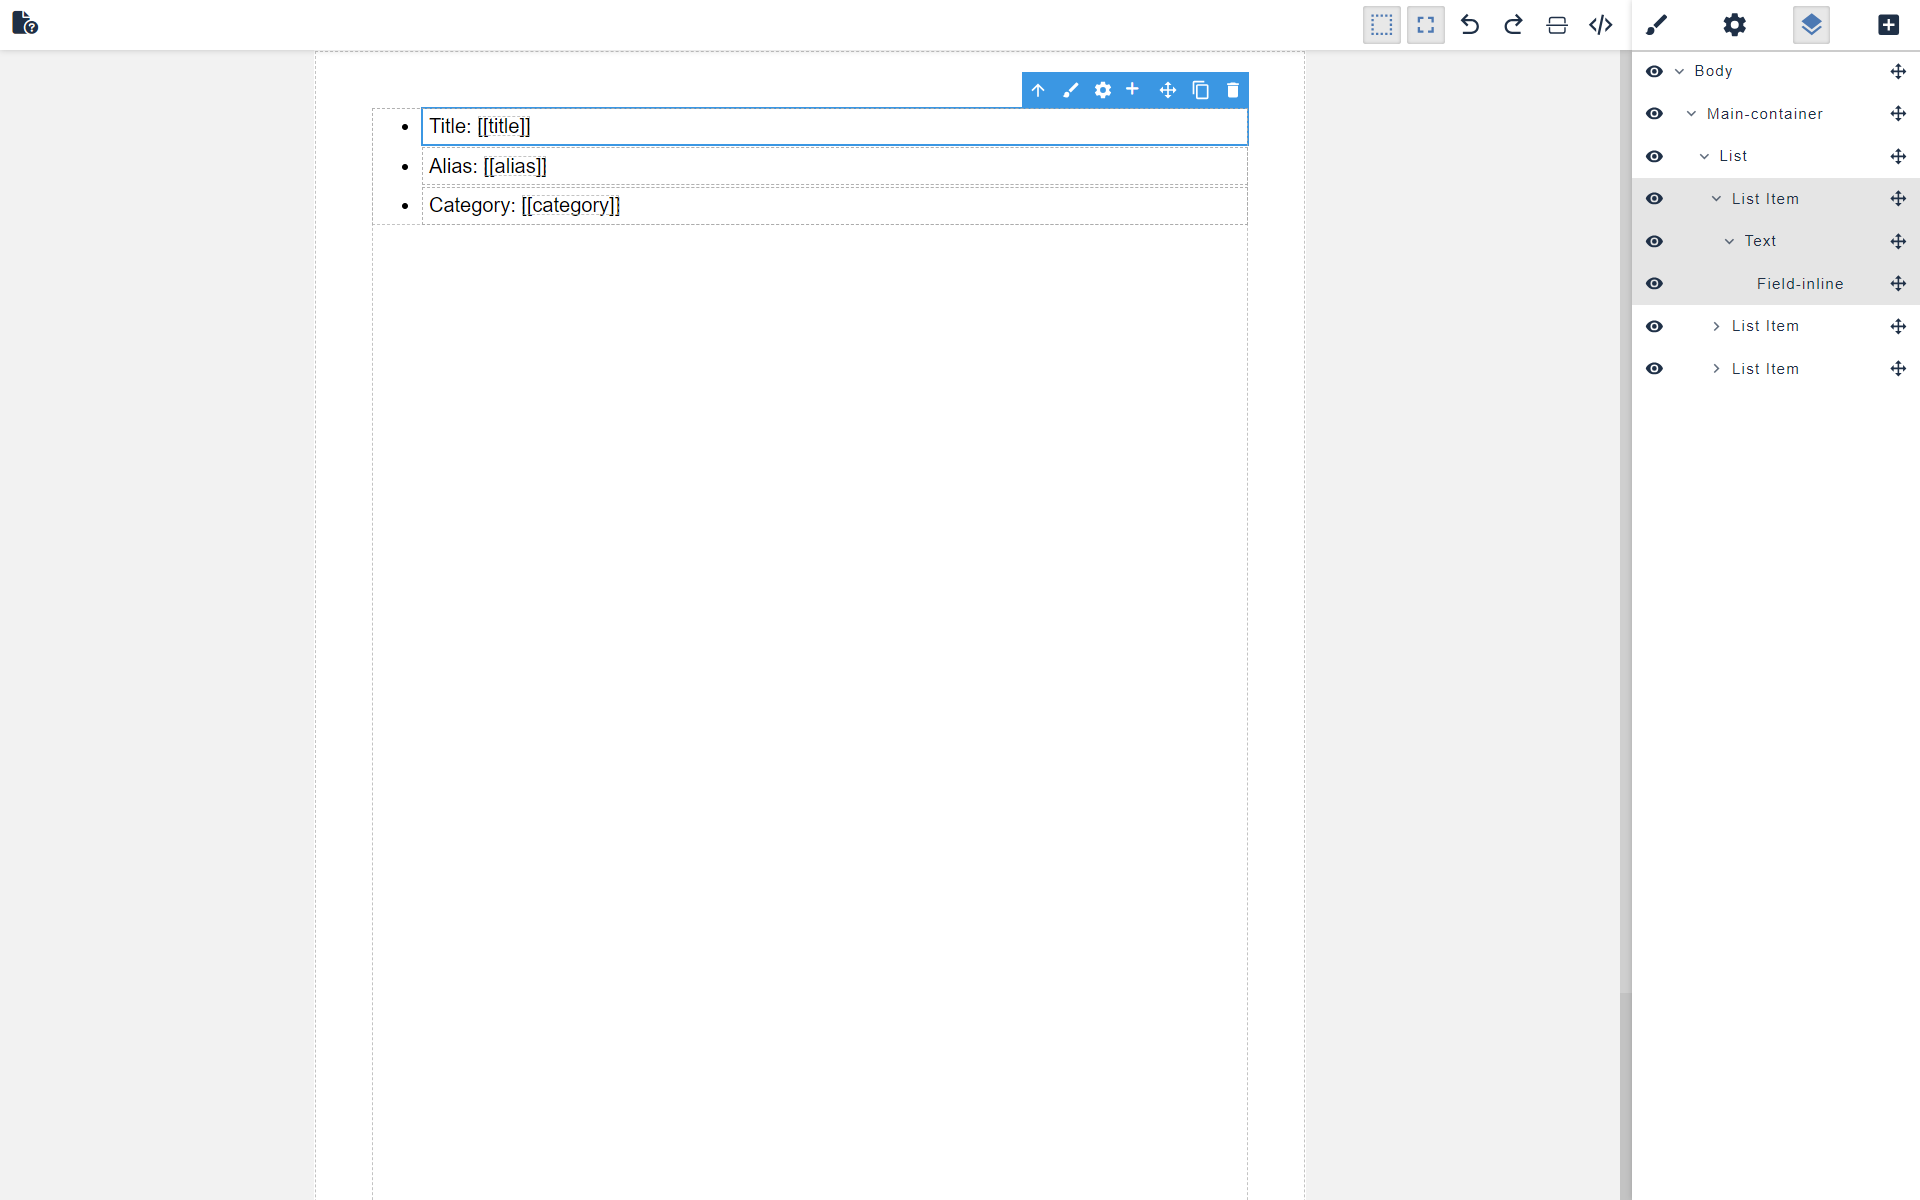
- Layers: Manage different layers within your template.
- Add: Insert predefined blocks via drag-and-drop onto the canvas, including text, images, responsive containers, columns, and more...
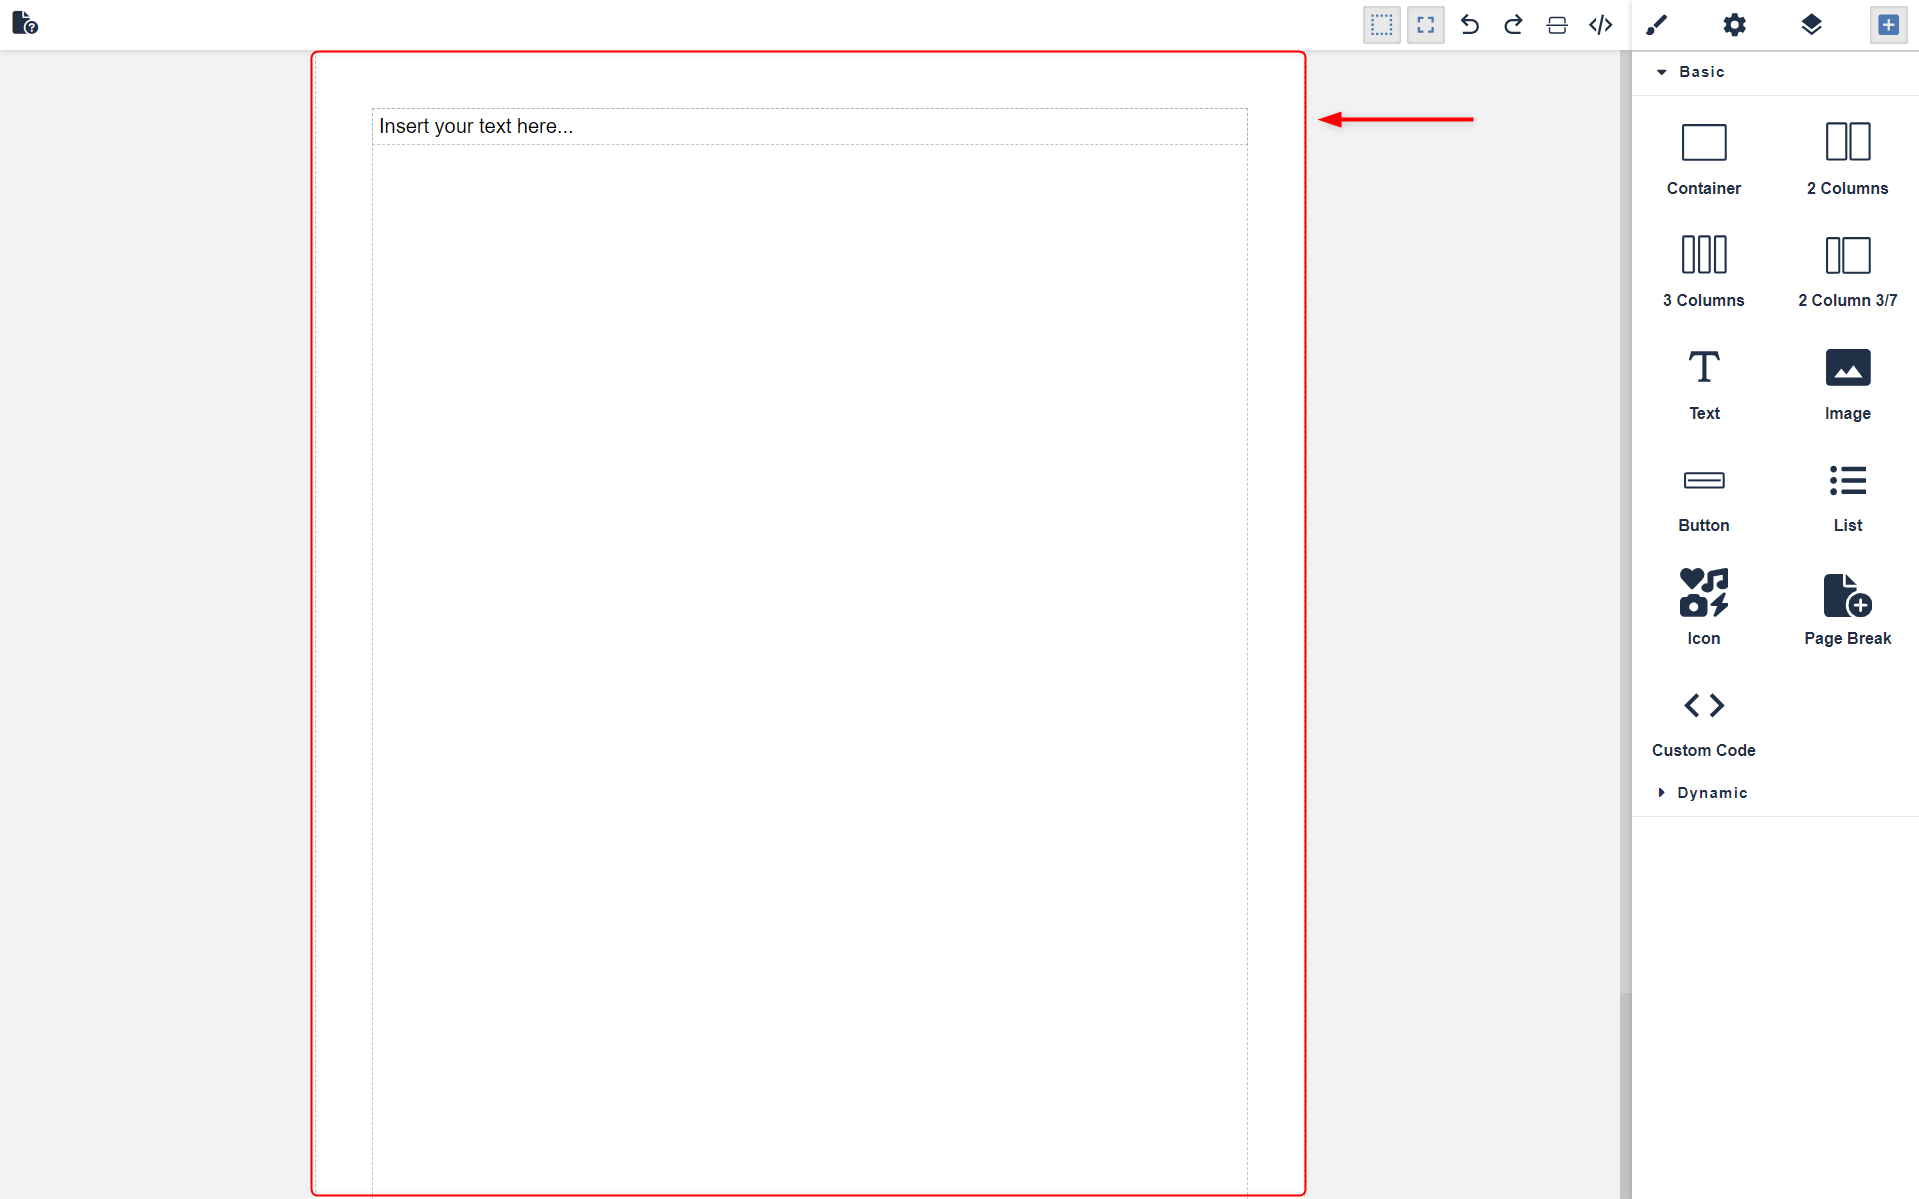
Canvas
In the context of the GrapesJS Visual Editor, the "canvas" refers to the main design area where you create and arrange template elements. It serves as the visual workspace for building your templates.
Content Fields (Shortcodes)
In the editor you can easily incorporate dynamic content into your templates using Field Blocks. These blocks are available in the Dynamic category of the Blocks section.
Using Field Blocks
Within the Dynamic category, you'll find two key blocks:
- Field: A standalone block that can be used to insert dynamic content fields directly onto your template.
- Field Inline: A block designed to integrate dynamic content fields within existing text blocks, allowing seamless incorporation of dynamic content within paragraphs or other text elements.
To use these blocks:
- Drag and drop the desired block (Field or Field Inline) from the Dynamic category onto the canvas. After placing the block on the canvas, double-click on it to open a modal where you can select the field you want to integrate.

- In the modal, use the search bar to quickly find the desired field or browse the list to make your selection. Once selected, the shortcode will automatically be inserted into the block.
Before using these blocks, ensure that you have selected a Data Type and Content Type in the General tab of the editing screen. Without selecting these options, no fields will be available for selection, and the Field Blocks will not function as intended.
Writing Shortcodes Manually
If you prefer, you can manually insert shortcodes into the template using the following syntax: [[fieldname]]. This
allows for precise control over the placement of dynamic content within your template.
The Template Editor seamlessly combines these powerful features with intuitive controls, enabling you to design and customize templates that meet your exact specifications with ease and precision.