")
")
3D viewer documentation
Introduction
Welcome to the documentation for the FLEXIcontent 3D Viewer field plugin. This plugin enhances the functionnality of FLEXIcontent, a powerful content construction kit (CCK) for Joomla, by allowing you to render 3D models using Google's Model Viewer. Whether you're creating websites for e-commerce, educational plaforms, or any other project requiring 3D model visualization, this plugin will help you achieve your goals.
Key Features
The 3D Viewer for FLEXIcontent plugin offers a range of exciting features, empowering you to create stunning 3D presentations. Here are some of its key features:
- Customizable Rendering: You can use the built-in editor to customize the output of the 3D renderer. Adjust lighting, shadows, background colors, use environment images, and more to set the perfect scene.
- Hotspots: Add hotspots to your 3D models using the editor. These hotspots can provide additional information, enhancing user engagement.
- Multiple Models on a Single Page: With the "3D Viewer for FLEXIcontent," you can display multiple 3D models on a single page using a single 3D viewer field. This feature enables you to create complex and dynamic presentations.
- Support for Animated Models: This plugin supports 3D models with animations, allowing you to showcase dynamic and interactive content.
- File Attachments: The plugin allows you to upload files related to the 3D model being displayed. You can specify which users are allowed to download these files. Choose to provide the 3D model only or a full ZIP package, including textures, animations, and more.
In this comprehensive guide, we will walk you through every aspect of the 3D Viewer plugin, from installation and configuration to troubleshooting common issues.
Let's get started.
Prerequisites
Before you begin using the 3D Viewer plugin, please ensure that your environment meets the following prerequisites:
- PHP Minimum Version 8.0: The 3D Viewer plugin requires PHP version 8.0 or higher for optimal performance and security. Make sure your hosting environment supports PHP 8.0 or higher.
- Joomla Version 3.10 or Higher: Ensure that your Joomla installation is version 3.10 or higher to fully utilize the capabilities of the 3D Viewer plugin.
- FLEXIcontent Installation: The FLEXIcontent extension must be installed on your Joomla website for the 3D Viewer plugin to function.
- PHP-ZIP Library: To upload zip files, ensure that the php-zip library is installed on your server.
Download
To start usign the 3D Viewer plugin, follow these straightforward steps:
1. Register or Log In and Purchase a License
You can get your license by clicking here, then follow these steps:

- If you don't already have an account, you can register a new account during the license purchase process.
- If you already have an account, simply log in using your existing credentials, and proceed with the purchase of your 3D Viewer license.
2. Download your files
After your subscription payment has been validated, you will receive a download URL by mail.
You can also access your download files by following these steps:

- From this website, log in to your account.
- Hover over Your Account in the site's main menu.
- Locate Your Files in the dropdown menu.
- In the Your Files section, find the 3D Viewer extension package.
- Click on the download link to save it to your computer.
Installation
Before you can start using the 3D Viewer extension, you need to install it on your Joomla website. The installation process varies slightly between Joomla 3 and Joomla 4. Below are installation instructions for both platforms.
Installing the Extension
- Log in to your Joomla administration panel.
- Joomla 3:
- Navigate to the Extensions tab in the top menu.
- Select Manage from the drop-down menu.
- Click on Install.

- Joomla 4:
- Navigate to the System tab in the side menu and find Install.
- Click on Extensions.
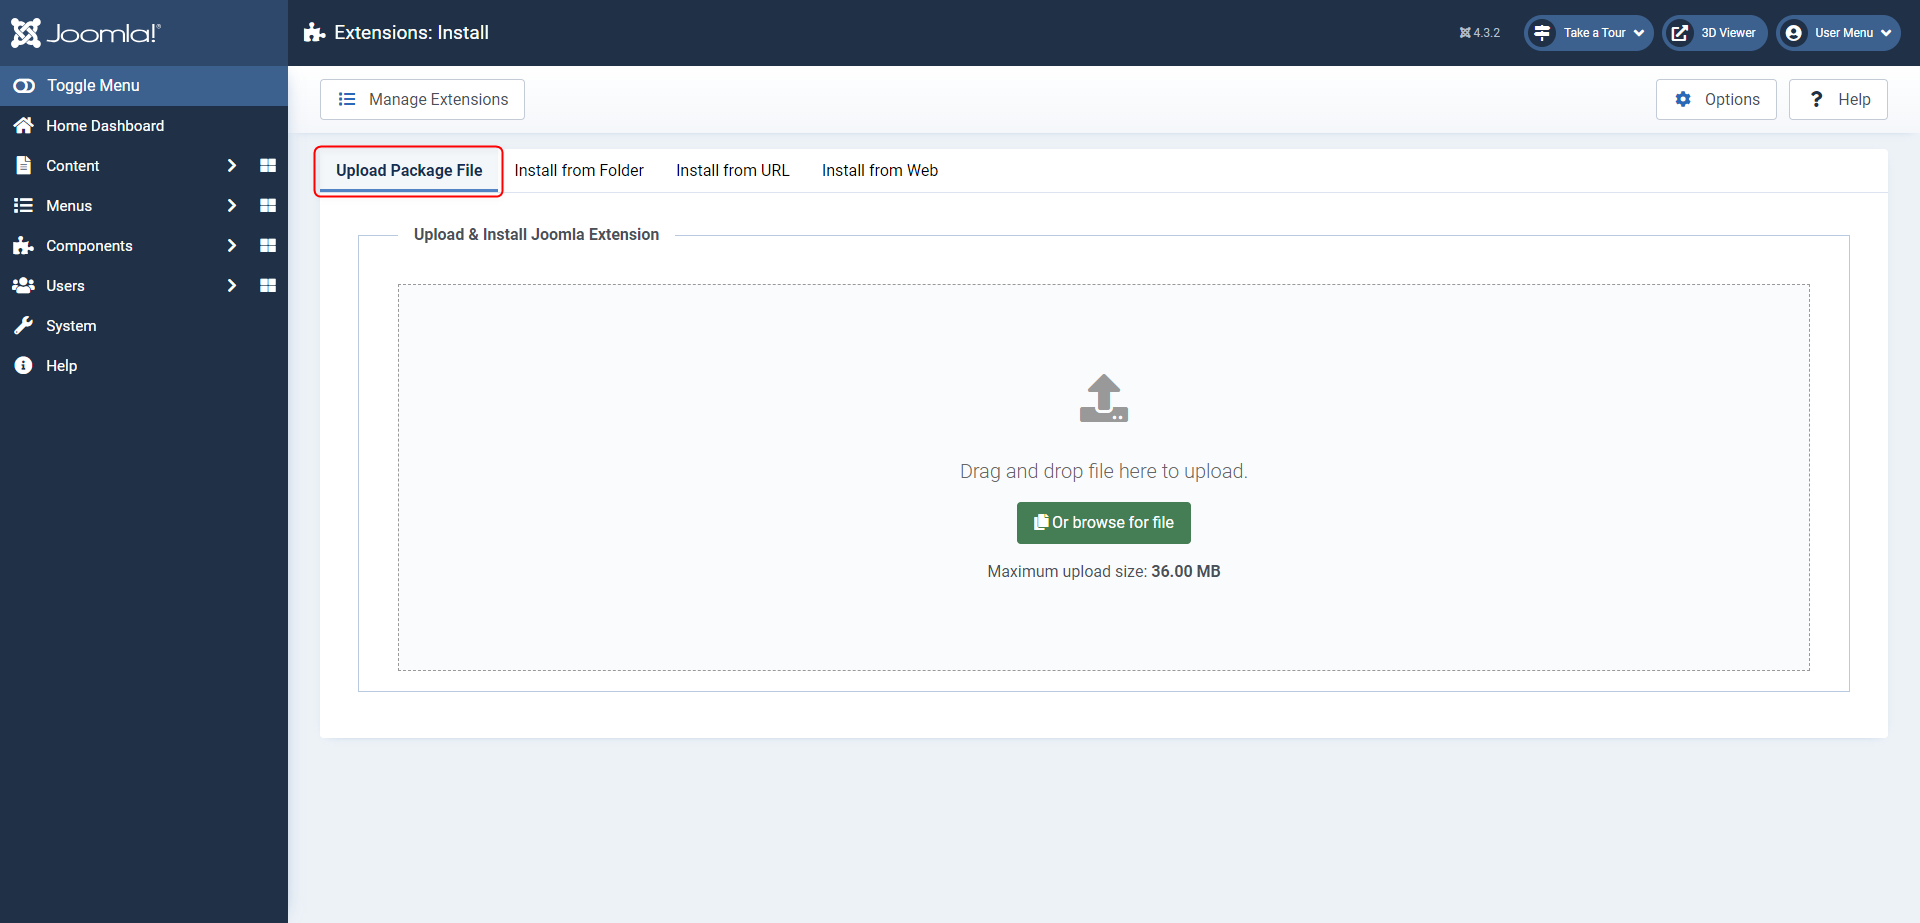
- Choose the Upload Package File tab.
- Click the Browse for File button or drag and drop the ZIP file into the designated area.
- Joomla will initiate the installation process once the file has been chosen or dropped.
Activating Plugins
When installing the 3D Viewer package, both the 3D Viewer field plugin and installer plugin will be enabled by default. If a problem occurs or if you need to re-enable a plugin manually, please follow the steps below. The process is quite similar for Joomla 3 and 4:

- Log in to your Joomla administration panel.
- Joomla 3:
- Navigate to the Extensions tab in the top menu and select Plugins.
- Joomla 4:
- Navigate to the System tab from the side menu, locate Manage and click on Plugins.
- Search for "3D Viewer" in the list of plugins.
- Click on the
 icon to enable the plugin, or click on the plugin's name and enable the plugin by setting Status to "Enabled".
 - Repeat the same steps for the "3D Viewer Installer" plugin.
The 3D Viewer extension is now successfully installed and activated on your Joomla website, and ready for use.
In the next section we'll guide you through the update proscess of the plugin, ensuring your extension stays up to date with the latest improvements.
Updates
Keeping your 3D Viewer extension up to date is essential to benefit from the latest improvements and features. The update process varies slightly between Joomla 3 and Joomla 4. Please follow the relevant instructions below.
Download ID
Let's start off by setting your download ID in the 3D Viewer Installer plugin, this will be similar across Joomla 3 and 4.
Generating Download IDs
- Log in to your account on this website.
- Hover over Your Account in the site's main menu.
- Locate Your Download IDs in the dropdown menu.
- From the "Your Download IDs" page, select the number of IDs you wish to create from the dropdown.
- Then click on Process to generate your download IDs.

You can create multiple Download IDs, each corresponding to a different domain. Once the Download ID is used, the corresponding domain will be defined automatically.
Configure Your Download ID
Now that you have generated a Download ID, locate the 3D Viewer Installer plugin by following the steps mentionned before in the installation process. This time, make sure to click on the plugin's name to access the configuration.
- In the Options tab, enter the Download ID you have just created.
This ensures that you can benefit from automatic updates while your license is active.
Updating the Extension
Automatic Updates
- Log in to your Joomla administration panel.
- Joomla 3:
- Navigate to the Extensions menu and select Manage.
- Click on Update.

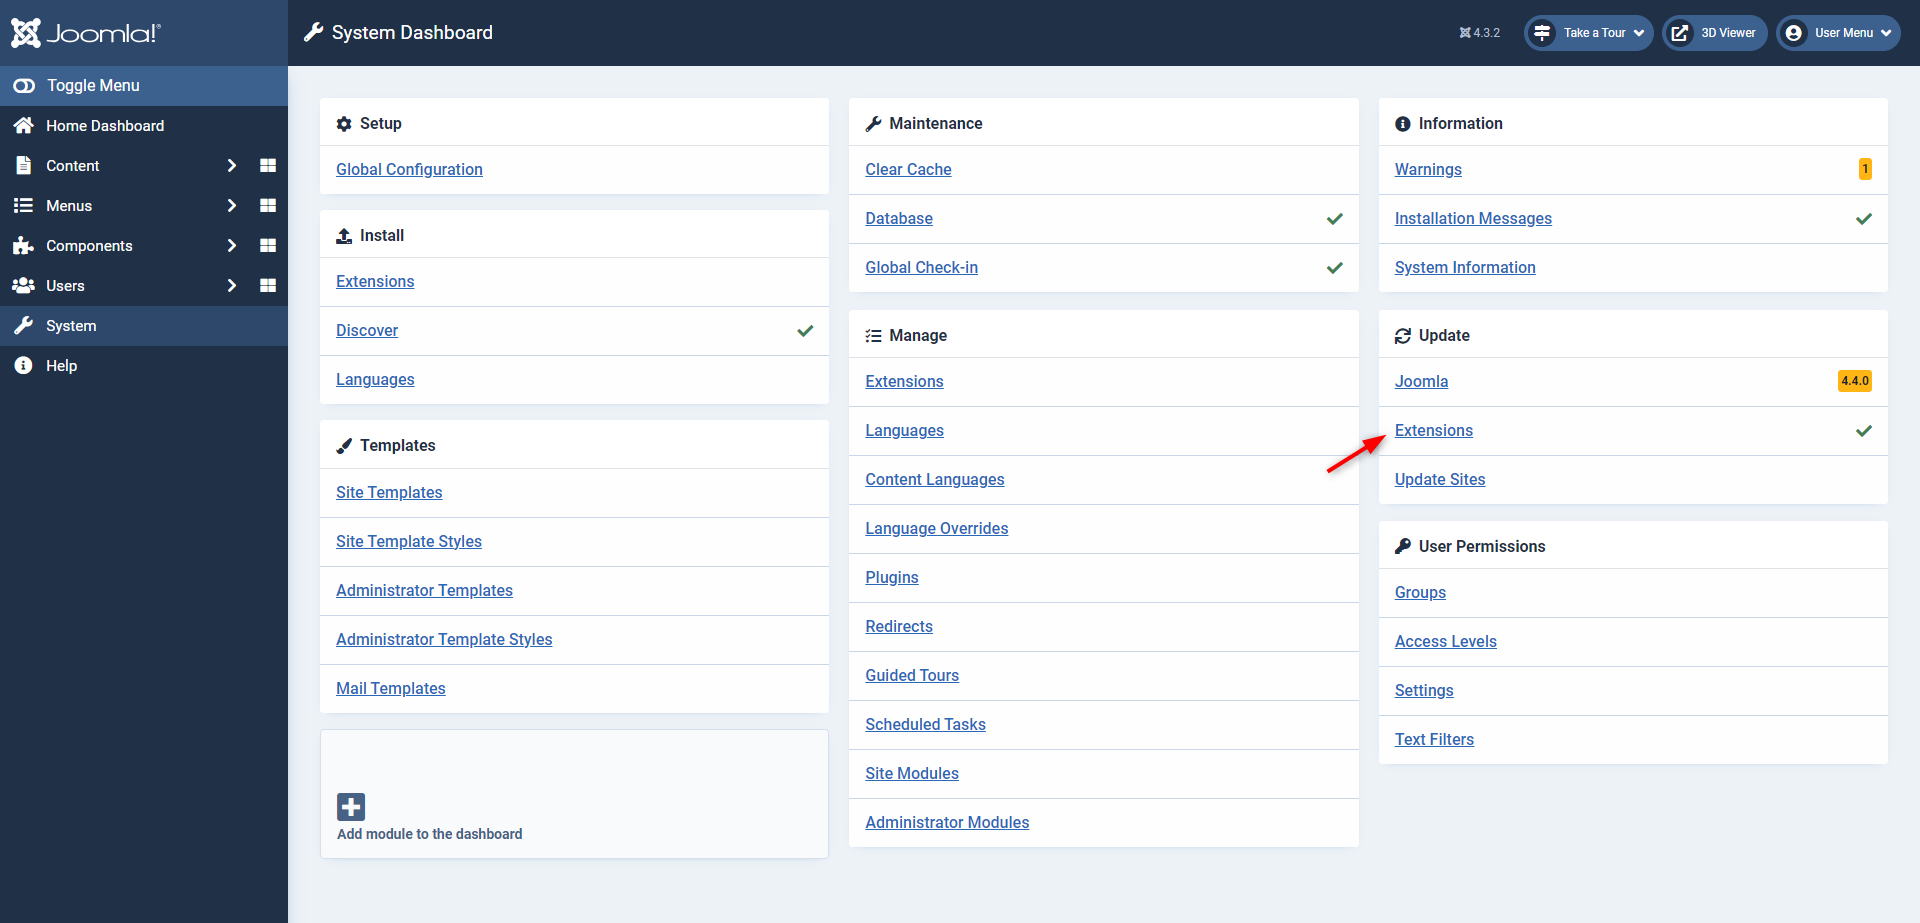
- Joomla 4:
- Navigate to the System menu and locate Update.
- Click on Extensions.
- A list of available updates will be displayed. Check if the 3D Viewer extension is listed. If not, click the Find Updates (J3) or Check for Updates (J4) button to refresh the list. If an update is available the extension should be listed. If you encounter any problems please refer to the Troubleshooting guide.
- Select the 3D Viewer entry in the list and click on Update to install the latest version.
Manual Updates
- Download the latest version of the extension by following the instructions mentioned in the download section.
- Then repeat the same steps as mentioned before in the installation process, accoridng to your Joomla version.
By following these instructions, you can ensure that your "3D Viewer for FLEXIcontent" extension remains up to date with the latest improvements and features.
Usage
In this section, we'll guide you through the process of creating, configuring and using a new FLEXIcontent 3D Viewer field. This will allow you to customize your 3D models' presentation and setup according to your specific requirements.
Creating a New 3D Viewer Field
1. Access the FLEXIcontent Component:
- Begin by logging in to your Joomla administration panel.
- In the backend, navigate to the Components tab in the top menu (for Joomla 3) or in the side menu (for Joomla 4).
- From the dropdown menu, select FLEXIcontent.
2. Add a New Field:
- Within the FLEXIcontent component, locate the Fields section.
- To create your new field, click on the New button to get started.
3. Choose Field Type:
- In the field creation window, select 3D Viewer as the Field Type for your new field.

- If you don't see "3D Viewer" in the list, it's possible that you haven't enabled the plugin. Please refer to the installation guide if this is the case.
4. Assign the Field to a Content Type:
- To make your new field functional, you need to assign it to a specific content type. In Types select at least one type to assign the field to. You have the option to assign the field to multiple types if needed.

5. Save and Close:
- After configuring the 3D Viewer field settings, click on either Add or Save & Close to create the new field.
- You can now begin adding 3D models to the content types to which you assigned this field.
Configuring the 3D Viewer Field
Configuring the 3D Viewer field is essential to ensure that your 3D models are displayed as desired. Here's how to configure the 3D Viewer field:
1. Access Field Configuration:
- In the Fields section, locate the 3D Viewer field you've created.
- Click on the field's name to access its configuration.
2. Value Options:
Within the Editing tab under "Values" in the "FIELD TYPE specific configuration," you can define how the field behaves in the form view (administrator).

- Required: Specify whether the field must be filled out when saving the content type.
- Allow Multiple Values: Indicate whether multiple values are allowed for a single 3D Viewer field.
- Max #values: Set the maximum number of models you can create with a single 3D Viewer field.
- Select a Folder (Environments): Choose the folder that will house your environment images. These images can be used as a light source and/or background for your 3D models. To learn how to add your environment files, please refer to the instructions below.
- Allow Download: If you allow downloads, you will be able to upload files that can be downloaded by your site's users when viewing the 3D Model, you will need to show the download button as well to make the downloads available.
- Authroised Extensions: Define the allowed file extensions for downloadable files. The 3D model renderer used in this project only supports GLB and GLTF files. If you want to offer other file types like STL, OBJ, FBX, etc., for download, specify the allowed extensions here for the uploaded downloadable files. You can even upload ZIP files containing animations, textures, and other resources essential for your 3D model to function.
User groups: Specify which user groups are allowed to download the downloadable files.
- (EXPERT) Authorised Extensions Within a ZIP File: Define the extension types permitted within an uploadable ZIP file. This check applies when uploading 3D models in ZIP file format for use with textures and animations, as well as when uploading downloadable ZIP files. By default, Joomla doesn't allow ZIP files to be uploaded due to potential security risks. If you need to allow a LICENSE file in .txt format, for example, ensure to add the .txt extension type here. Always exercise caution and only allow extension types you trust to maintain site and user safety.
3. Layout Options:
In the Viewing tab under Layout within the "FIELD TYPE specific configuration," you can determine how the field will be presented on your site in the Item view.

- Values layout: Select the layout for displaying 3D models in your content item. This feature is primarily geared towards developers or individuals with technical expertise. To create custom layouts, generate a new file in the
tmpldirectory of the plugin and name itvalue_<your-layout-name>.php. You can reference thevalue_default.phpfile to help you get started. - Container CSS classes: Specify classes for the container element surrounding your 3D Models. You can assign multiple classes by separating them with spaces, e.g.,
container-fluid my-container. - Item CSS classes: Set classes for each individual 3D model display rendered by the 3D Viewer field. You can apply multiple classes, e.g.,
shadow-sm rounded border-0. - Sizing:
- Container width (in %): Define the percentage-based size of the container element that holds the 3D models for display.
- Item min width (in px): Set the minimum size in pixels for each individual 3D model display within the container, especially useful for responsive designs.
- Item height (in px): Specify the height of each individual 3D model display within the container.
- Grid gap (in px): Determine the spacing between each individual 3D model display within the container.
- Buttons Display:
- Layout: Choose a layout type to display your fullscreen and download buttons.
- overlay: Shows the buttons on top of the 3D model.
- card footer: Displays the buttons underneath the 3D model, giving it a card-like appearance.
- Download Button - Show: Decide whether to display the download button or not.
- Download Button - CSS classes: Define a list of classes for the download button, e.g.,
btn btn-sm btn-light. - Download Button - Text: Customize the text displayed on the download button (default is empty).
- Fullscreen Button - Show: Specify whether to display the fullscreen button. The fullscreen button enables users to view the 3D model in fullscreen.
- Fullscreen Button - CSS classes: Define a list of classes for the fullscreen button, e.g.,
btn btn-sm btn-light. - Fullscreen Button - Text: Set the text to display in the fullscreen button (default is empty).
- Layout: Choose a layout type to display your fullscreen and download buttons.
- Staging:
- Auto Rotate: Decide whether the 3D model should rotate automatically when rendered.
- Auto Rotate Start Delay: The delay before the auto rotation starts.
- Interaction Prompt - Show prompt: Choose whether to display the interaction prompt, which informs users that they can interact with the 3D model being shown. This setting applies to all models within the container.
- Interaction Prompt - Style:
- basic: A static interaction prompt.
- wiggle: An animated interaction prompt.
- Interaction Prompt - Prompt Treshold: Specify the delay before the interaction prompt is shown, relative to the user's last interaction with the 3D model.


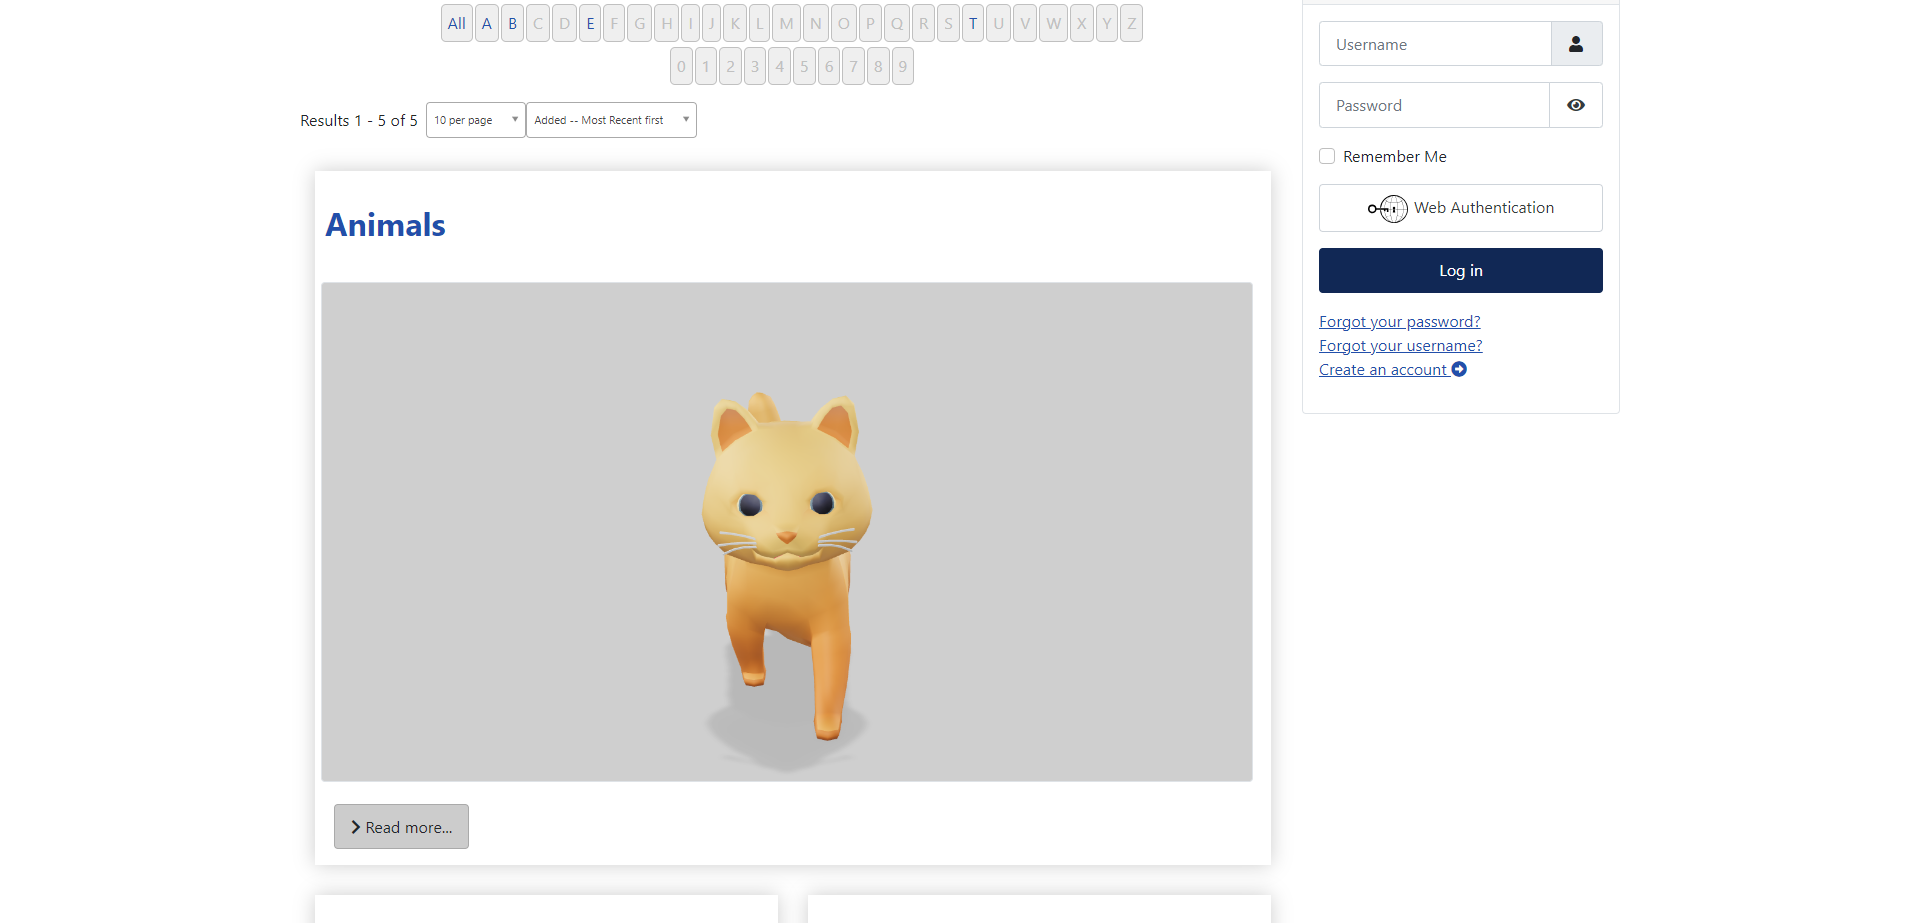
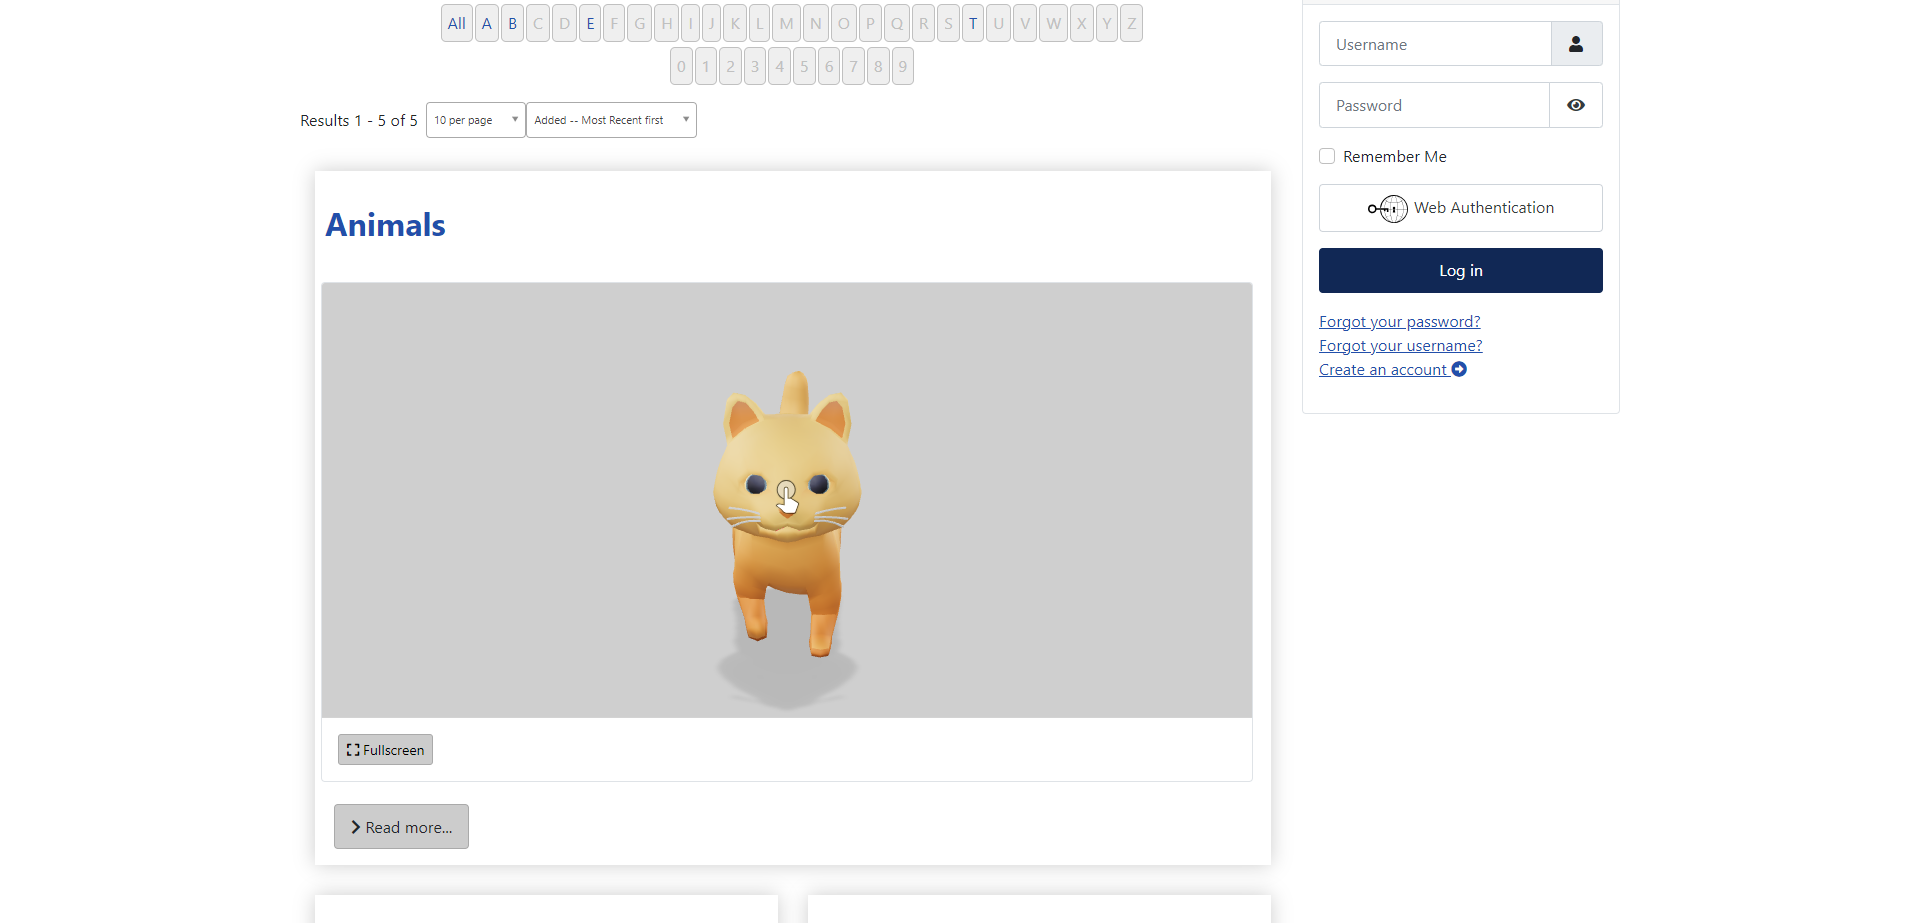
4. Category Layout Options:
In the Viewing tab under Category Layout within the "FIELD TYPE specific configuration," you can determine how the field will be presented on your site in the Category view
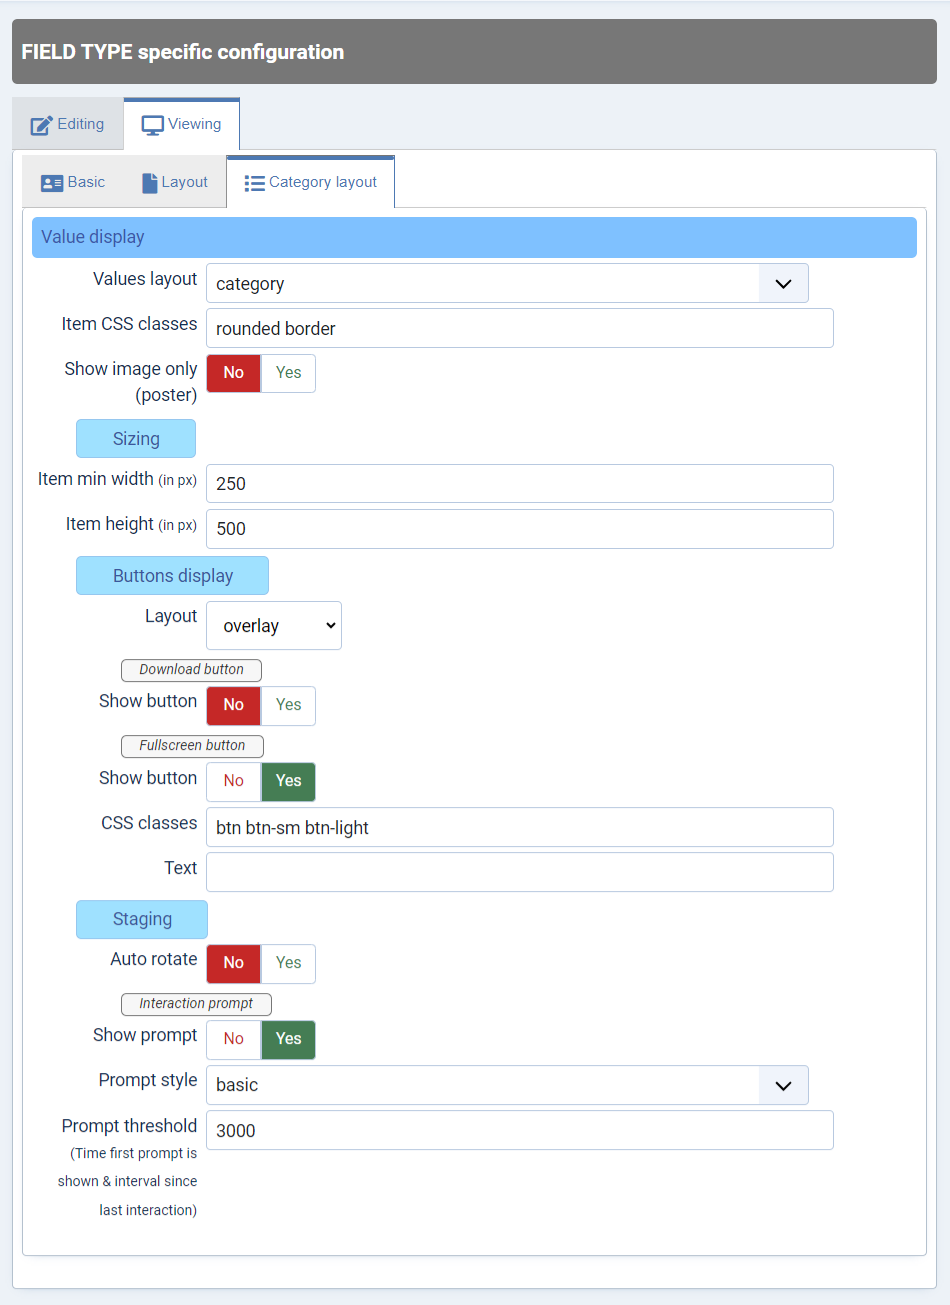
- Values layout: Select the layout for displaying 3D models in the category view. This feature is primarily geared towards developers or individuals with technical expertise. To create custom layouts, generate a new file in the
tmpldirectory of the plugin and name itvalue_<your-layout-name>.php. You can reference thevalue_category.phpfile to help you get started. - Item CSS classes: Set classes for the 3D model display rendered in the category view. You can apply multiple classes, e.g.,
rounded border. - (Recommended) Show Image Only: To enhance performance, you have the option to display only the image/poster when viewing the category. You can generate this poster in the Model editor. For more details, please refer to: The Editor.
- Sizing:
- Item min width (in px): Set the minimum size in pixels for the 3D model display, especially useful for responsive designs.
- Item height (in px): Specify the height of the 3D model display.
- Buttons Display:
- Layout: Choose a layout type to display your fullscreen and download buttons.
- overlay: Shows the buttons on top of the 3D model.
- card footer: Displays the buttons underneath the 3D model, giving it a card-like appearance.
- Download Button - Show: Decide whether to display the download button or not.
- Download Button - CSS classes: Define a list of classes for the download button, e.g.,
btn btn-sm btn-light. - Download Button - Text: Customize the text displayed on the download button (default is empty).
- Fullscreen Button - Show: Specify whether to display the fullscreen button. The fullscreen button enables users to view the 3D model in fullscreen.
- Fullscreen Button - CSS classes: Define a list of classes for the fullscreen button, e.g.,
btn btn-sm btn-light. - Fullscreen Button - Text: Set the text to display in the fullscreen button (default is empty).
- Layout: Choose a layout type to display your fullscreen and download buttons.
- Staging:
- Auto rotate: Decide whether the 3D model should rotate automatically when rendered.
- Auto Rotate Start Delay (in ms): The delay before the auto rotation starts.
- Interaction Prompt - Show prompt: Choose whether to display the interaction prompt, which informs users that they can interact with the 3D model being shown. This setting applies to all models within the container.
- Interaction Prompt - Style:
- basic: A static interaction prompt.
- wiggle: An animated interaction prompt.
- Interaction Prompt - Prompt Treshold (in ms): Specify the delay before the interaction prompt is shown, relative to the user's last interaction with the 3D model.

5. Save Changes:
After configuring the 3D Viewer field to your satisfaction, make sure to click the Apply, Save & Close, or similar button to save your changes.
Adding 3D Models to Your Items
Now that your 3D Viewer field is configured, let's begin using it to incorporate 3D models into your content item to which you've assigned the field.
1. Create a New or Edit an Existing Item:
- Begin by logging in to your Joomla administration panel.
- In the backend, navigate to the Components tab in the top menu (for Joomla 3) or in the side menu (for Joomla 4).
- From the dropdown menu, select FLEXIcontent.
- Choose Items.
- You can create a new item by clicking New and select the content type you've assigned the 3D Viewer field to. Alternatively, you can click on an existing compatible item's title to begin editing.
- Navigate to the <Your Item type> (Details) tab, in order to access your custom fields.
2. Add a Model
Now, you should see the 3D Viewer field. Depending on your setup, you can either add multiple 3D models to your item using Joomla's subform field system or a single 3D model. Let's explore the various fields that make up a 3D Viewer model:

- Description: You can provide a description for your 3D model. This text won't be visible on your site but serves as an accessibility setting, aiding screen readers and similar tools.
- Show Details: After uploading all the necessary files, you may choose to hide the model's details to declutter the editing view.
- 3D Model: Select a file to upload. Please note that the internal model renderer supports only GLB and GLTF files. If your 3D model requires textures and animations, you can upload a ZIP file. In case you encounter difficulties while uploading your ZIP file, review your 3D Viewer field configuration; it might be necessary to allow additional extension types for successful uploads.
- File to Download: Upload the file that your users will be able to download based on your configuration. This field is visible only if you've enabled downloads in the field's settings. Keep in mind that you can upload files in various formats as needed, as per the field's configuration settings. If necessary, you can also upload ZIP files; refer to the configuration guide for more details.
- Poster: Utilizing a poster can enhance performance when loading a page. While the renderer sets up, the poster is displayed, preventing empty spaces. You can create a poster in the Editor (for more information about the editor, please check below).
- Poster Preview: A visual preview of the poster you've uploaded. Even if you choose to hide the model's details, you'll still be able to see the poster you've defined.
- Editor (accessible after uploading a model): Once you have finished uploading your model and saved your item, you will be able to access the model editor. We will go over the editor in more detail in the next section.
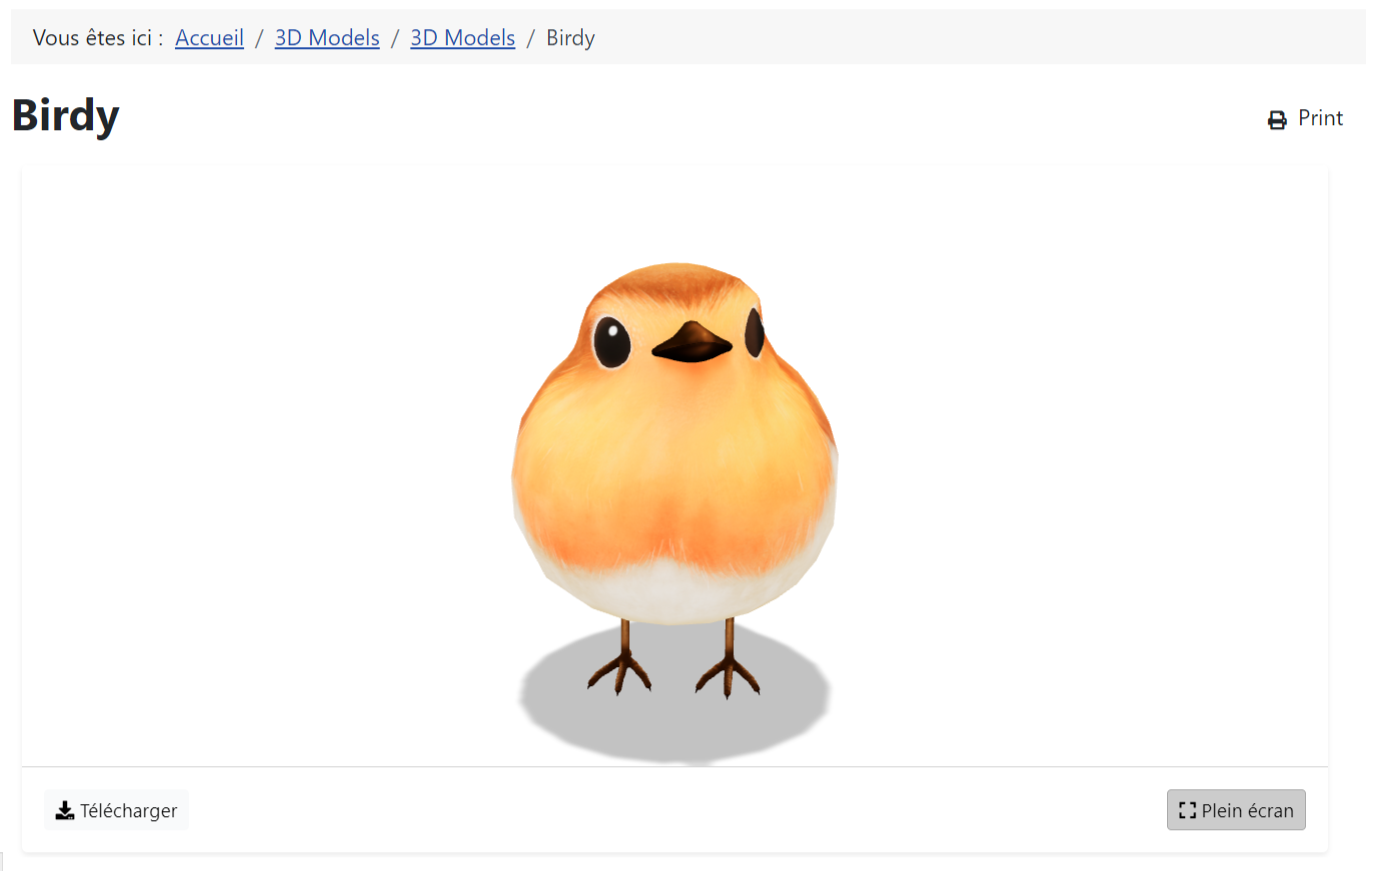
3. Edit Layout Parameters (Item)
To ensure your field appears in the item view, you'll need to place it within the item layout:

- In the toolbar, click on Edit layout & global parameters.
- Select the Fields placement tab.
- Locate the 3D Viewer field in the Custom (non-Core) fields list.
- Drag & drop it onto one of the available zones.
- Click Save to save your changes.
You should now be able to see your 3D model rendered on your site. To preview it, use one of the preview methods from the toolbar.
The Editor
The Model Editor offers a range of tools to customize the appearance and functionality of your 3D models. Here's how to use the Model Editor:
1. Accessing the Model Editor:
To access the Model Editor, follow these steps:
- First, ensure you have uploaded a 3D model withing the 3D Viewer field, and saved your content item
- Within the 3D Viewer field, click on Open editor for the specific model you wish to modify the display for.
2. Editor's Customization Options:
Now, let's explore the various options the Model Editor offers to tailor the look of your 3D model:

- Edit:
- Background color: Select a background color for your 3D model display.
- Environment: Controls the environmental reflection of the model.
- Use environment as skybox: Set the background image of the scene and apply an environment map to the model. Supports png, jpg, and hdr (recommended) images.
- Exposure: Adjust the exposure of both the model and the skybox.
- Shadow Intensity: Manage the opacity of shadows. Set to 0 to disable shadows entirely.
- Shadow Softness: Controls the blurriness of the shadow. Set to 0 for hard shadows. Softer shadows render faster.
- Poster: Display an image before the model fully loads and renders. This image can be shown in the category view layout instead of the 3D model to improve performance.
- Pause Animation (if applicable): If your model includes an animation, you can choose to pause the animation, which can be helpful during poster creation.
- Reset Animation (if applicable): This option resets the animation to its starting position, aiding in the creation of your poster and ensuring a smooth transition from the poster to the 3D rendering
- Save: Save the poster to your computer.
- Hotspots: Hotspots allow you to add points of interest to your 3D model display. To add a hotspot:
- Start by clicking on Add hotspot.
- Click on the model where you want to place the hotspot.
- You can add text to your hotspot by specifying a value in the Hotspot label text input created when adding the hotspot.
- Click on the
 icon to remove a hotspot you've created.
3. Save your Configuration:
- Click Keep configuration to retain the customization options you've just set.
- Don't forget to save your content item by clicking Apply, Save & Close, or an equivalent option to save your 3D model render configuration.

In this section, we've guided you through the process of creating and configuring a new FLEXIcontent 3D Viewer field, enabling you to tailor the presentation and setup of your 3D models to meet your specific requirements. With the ability to create new fields, configure them, and add models to your content items, you now have the tools to enhance your Joomla website with captivating 3D content.
Adding Environment Images
Environment images can serve as a light source and/or background for your 3D models. Follow the steps below to add new environment images. Please Take note that three types of extensions are allowed: .png, .jpg, and the recommended .hdr:
1. Create a New Folder in the Joomla Image Manager:
- Access the Joomla Image Manager.
- Create a new folder dedicated to environment images.

2. Configure the Image Manager:
- Adjust the maximum upload size according to your needs.
- In Allowed Extensions, add "hdr".
- In Legal Image Extensions (File Types), add "hdr".
- In Legal MIME Types, add "application/octet-stream". Caution: Ensure uploads are restricted to guarantee security.

These settings will allow the addition of HDR images through the Joomla Image Manager.
3. Upload Your Images:
- Upload your HDR images to the recently created folder.
4. Use Your Environment Images:
- Select the created folder in the field configuration under the Environments section in the Editing tab under Values in the "FIELD TYPE specific configuration."

By following these steps, you can easily integrate and use your new environment images with the "3D Viewer" extension.
Troubleshooting
In this troubleshooting guide, we address common issues that users may encounter when working with Joomla and FLEXIcontent's 3D Viewer Field in conjunction with Google's Model-Viewer. From 3D model display problems to performance issues and discrepancies between rendering engines, we provide solutions to help you overcome these challenges and make the most of your 3D content integration. By following the solutions outlined below, you can ensure a smoother experience while working with 3D models on your Joomla website.
Issue: The 3D Viewer extension update doesn't appear in Joomla.
Solution:
- Refresh Update Sites: Sometimes, updates may not show up due to outdated or incomplete update site data. To address this, follow these steps:
- Log in to your Joomla administration panel.
- Joomla 3:
- Navigate to the Extensions menu and select Manage.
- Joomla 4:
- Navigate to the System menu, and look for Update.
- Click on Update Sites.
- Click the Rebuild button to ensure your update sites are up to date.
- Contact Support: If the update still doesn't appear, and you've tried the steps above, it's advisable to contact our support team for further assistance. Visit our Support Page, submit a support request, and provide details about the update issue you're facing. Our support team will review your request and provide guidance to resolve the problem.
Issue: The 3D model and or buttons are not displaying on the site
Solution:
- Check 3D Model Format: Ensure that you've uploaded a 3D model in a supported format. Google's Model-Viewer primarily supports GLB and GLTF files. If you're using a different format, consider converting your model to GLB or GLTF.
- Model Rendering Issues: Verify that the uploaded 3D model is correctly configured. Check for issues with textures, animations, or other model-specific settings that may affect rendering.
- Field Configuration: In the Joomla administration panel, review the configuration settings for the 3D Viewer field. Ensure that the "Values" and "Viewing" related options are correctly set. Pay special attention to the "Allow Download" and "User Groups" settings if you want users to download the 3D model.
- File Upload Issues: If you're using ZIP files for your 3D models or other downloadable files, ensure that you've configured the "Authorised Extensions" within the 3D Viewer field's settings. This step is important to allow the upload and rendering of ZIP files.
- Access Control: Check user group permissions. If the 3D model download isn't working for specific users or user groups, review the access control settings to ensure they have permission to download.
- Model-Viewer Compatibility: Update or reinstall the plugin to ensure you have the latest version that works seamlessly with Joomla and FLEXIcontent.
Issue: Slow Loading or Performance Issues
Solution:
- Image/Poster Optimization: Use a well-optimized image or poster in the Model-Viewer. A high-resolution or large image might slow down the loading speed. Consider using compressed images for faster loading times.
- 3D Model Complexity: High-polygon 3D models can impact loading times. Simplify the models if possible, or choose more efficient formats such as GLB. Also, consider reducing the number of models displayed on a single page.
- Hosting Environment: Ensure that your hosting environment can handle the 3D rendering. Check server resources like CPU, memory, and GPU capabilities to guarantee smooth performance.
- Caching: Joomla offers caching options. Enable caching to reduce page loading times. If you're using a Joomla extension for caching, make sure it's correctly configured.
Issue: 3D Model Display Issues on Mobile Devices
Solution:
- Browser Compatibility: Ensure that the mobile browsers you're targeting support Google's Model-Viewer. Check the compatibility list provided by Google to confirm that the feature is supported.
- Responsive Design: Verify that your Joomla template is mobile-responsive. The 3D model might not display correctly if the template isn't optimized for mobile devices.
- Browser Extensions: Certain browser extensions or ad-blockers can interfere with the rendering of 3D models. Ask users to disable such extensions when viewing 3D content.
Issue: The Model Editor Is Not Working
Solution:
- JavaScript and Browser Compatibility: The Model Editor relies on JavaScript. Ensure that JavaScript is enabled in your browser. Also, check if you're using a browser that's compatible with the Model-Viewer and Joomla's admin panel.
- Editor Configuration: Review your editor configuration settings. Check if any field entries are incomplete or contain invalid characters.
- Internet Connection: Slow or unstable internet connections can affect the Model Editor's functionality. Ensure you have a stable internet connection when using the editor.
Following these troubleshooting steps, you can resolve common issues when using Joomla, FLEXIcontent, and Google's Model-Viewer with the 3D Viewer Field. For more complex or specific issues, please reach out to our support.
