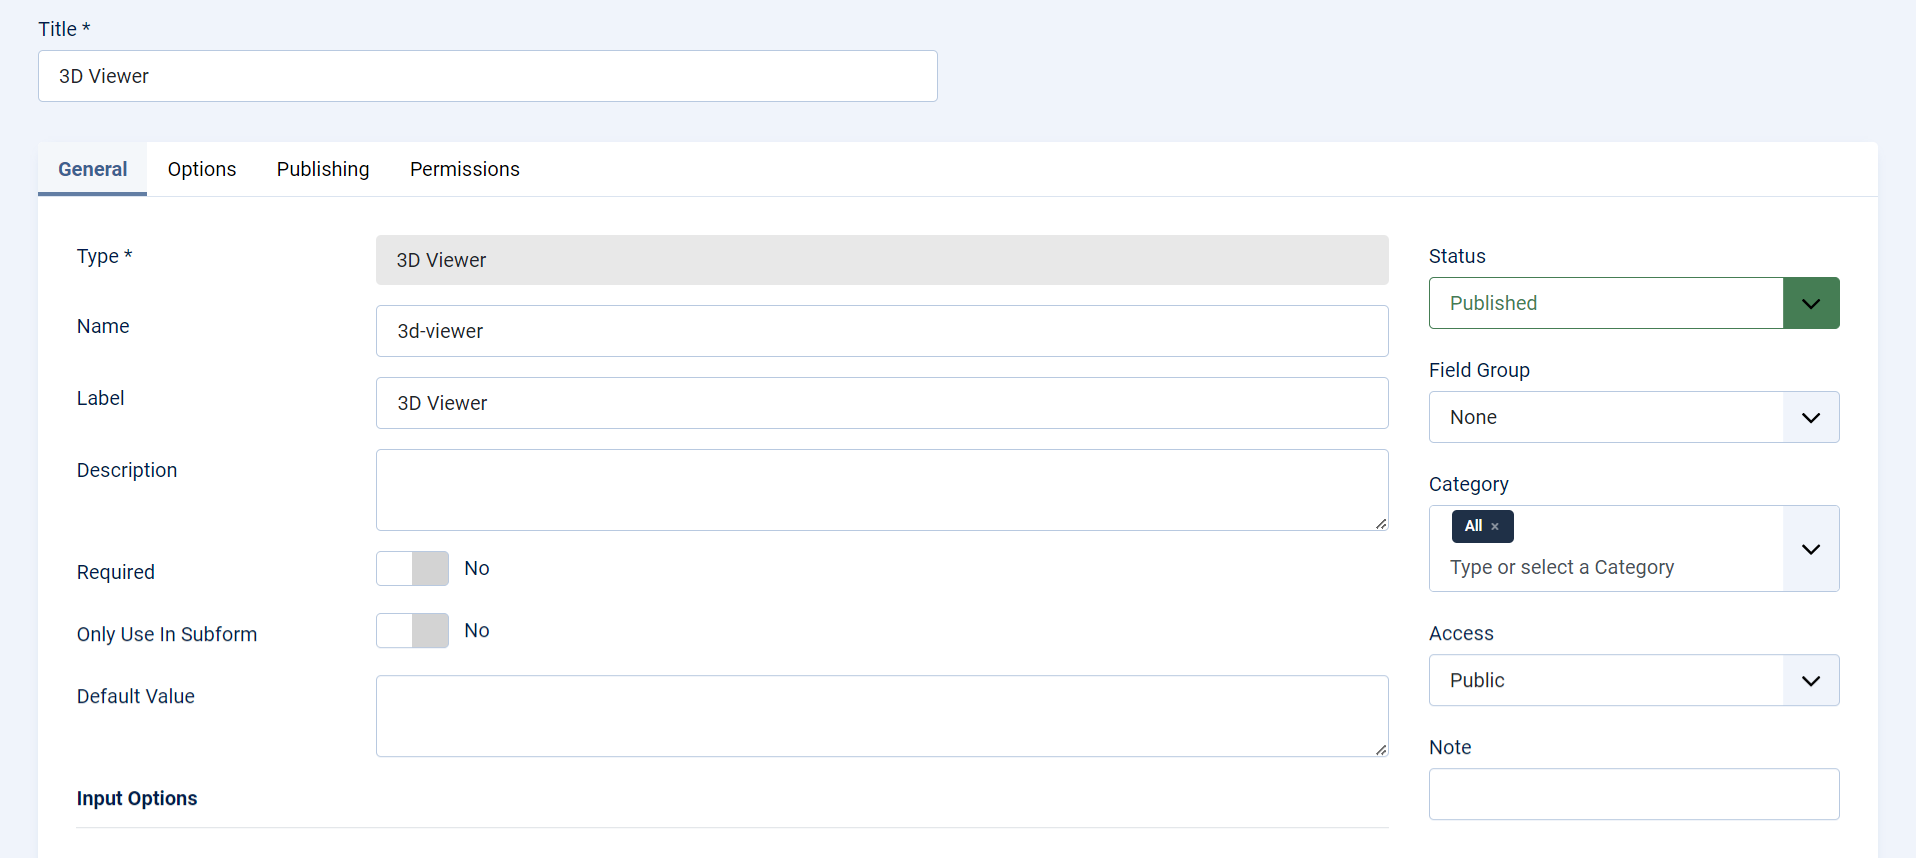
Creating a New 3D Viewer Field
To create a new custom field in Joomla for the 3D Viewer Field plugin, follow these steps:
Access the Fields Manager
- Navigate to Content -> Fields in the Joomla admin panel.
- Click on the New button to create a new field.
Configure the New Field
- Title: Enter a title for your field. This title will be displayed in the admin interface.
- Type: From the drop-down menu, select "3D Viewer". This option should be available if the 3D Viewer extension is properly installed.
- Name (Auto-generated from title): Provide a unique name for the field. This name will be used to reference the field programmatically.
- Label (Auto-generated from title): Enter a label for the field.
- Description (Optional): Provide a description for the field. This can help users understand the purpose of the field.
Set Additional Options
- Required: Set to Yes if the field is mandatory.
- Default Value (Optional): Specify a default value for the field.
- State (Right Panel): Set to Published to make the field active.
- Field Group (Right Panel): Assign the field to a specific field group if desired. This helps organize fields in the backend.
- Category (Right Panel): Choose the category to which the field belongs. This determines where the field will be available.
- Access (Right Panel): Choose the access level for the field (e.g., Public, Registered, Special).
info
Additional configuration options specific to the 3D Viewer field will be explained in the next section "Configuring the 3D Viewer Field".
Save the Field
Once all configurations are set, click on the Save & Close button to create the field.
By following these steps, you will have successfully created a new 3D Viewer field, allowing users to select and upload 3D models within the specified categories or articles.
